A step by step guide from our award wining lighting designer
Fraser Besant. Find out more about his work on his website www.fraserbesantlighting.co.uk Step 1
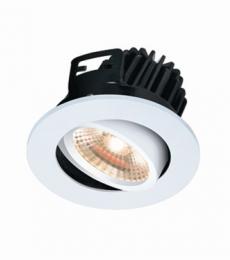
Primary lighting. This is very important in a kitchen and to achieve good levels of even light I would always recommend a recessed LED downlight. You can buy dedicated LED downlights but if the LED fails or has issues this means the whole unit must be replaced. I tell my customers to buy a GU10 fire rated downlight which you can easily change the lamp over. When you are positioning your downlights focus on the high usage areas of the kitchen such as the worktops and island. Below is an example of a lighting design I did recently for a customer. You can see how I have positioned the downlights to get the best spread of light.
There are two types of primary downlight that I always use on my designs. A normal mains fire rated Evofire downlight. The LED sits at the front of the light and you get the full 36-40 degree beam angle from the LED. This is what I use in the main kitchen to get a good spread of light. Then there is the baffled Evofire. This is where the LED is pulled back up into the ceiling meaning you can a more focused sword of light. These are more discreet and subtle. They are ideal around dining tables, in lounges and to acheive a wall wash effect. Both are detailed below.
They are our best selling downlights and always receive good feedback.
Your Pendants
There are many styles, sizes and finishes of pendants on the market. For me as a designer though there is only one obvious choice when looking to best light your kitchen. With open plan living spaces it is all about the space and showing off the room A metal or fabric pendant hanging down at head height will detract from the view across the room. I always recommend a simple clear glass pendant. Three over the breakfast bar and one over the dining table. You can fit them with a gorgeous filament LED lamp and really enjoy the open plan feel of the room. On or off they are simple, modern and discreet.
We make our own range of glass pendants and you can choose the cable colour, ceiling rose and lampholder finish. We offer over 20 colours of cable so you can have anything you like. We offer copper, gold and silver lampholders and a huge choice of ceiling roses. These are our best selling glass pendants and people love specifying their own lights and getting them made to suit there requirements. Copper and grey kitchens are very popular so why not pick a copper lampholder and our grey fabric cable to accent this?
LED tape and where to use it
We supply LED tape to nearly everyone who is working on their home. It is easy to install, energy efficient and lasts 10+ years. The most common use for LED tape is to light the worktops. Fix the LED tape to underside of the kitchen cabinets to offer an even spread of bright light over the work surfaces. We offer a bespoke LED tape which is cut and made to measure. You simply give us your measurements and we will do the rest. The LED tape is high CRI meaning it produces more colours. This makes it ideal for lighting granite, marble and wooden worktops. It will really enhance the natural colours. It comes in 2700k warm white and 4000k cool white. For primary lighting of your worktops I would always recommend the 9.6watt per metre LED tape.
You can also use LED tape to provide a source of secondary lighting under the kickboards or under the kitchen worktops. This should always be switched independently to your other LED tape. The key to a considered lighting design is always to split the lighting circuits down and have different sources of lighting controlled on there own.
If you have a single story extension it is likely you will have a ceiling lantern light or windows in the ceiling. While this a great idea it is worth remembering that at night when the sun has gone in, you will be left with a black square on the ceiling. You have also taken away valuable ceiling space onto which you would suspend or recess a light. I often use LED tape on my designs to work around this problem. Framing up the window or lantern with a subtle surface mounted L shaped profile. This holds the tape and points the light up at the window. The glass acts like a giant mirror and reflects the light back into the room. In essence you create a window skylight at night.
Wall lighting I always use wall lights on my designs. The first thing I will advise is try to avoid positioning a wall light in the middle of a wall as you cannot then hang a picture or mirror. Try to position them at each end of the wall. With wall lights, they do not have to make a statement. In fact quite the opposite. We have a gorgeous selection of minimalist ceramic wall lights that can even be painted to match the wall.
If you decide to use these stylish up/down internal wall lights which offer a beautiful jet of light then you may want to consider using a similar style of light for the external walls. A lot of open plan kitchen spaces have sliding doors or bi-folds leading straight into the garden. To get continuity in the lighting design use an up/down garden wall light outside either side of the doors to accent the house and mirror the indoor lights.
I will be writing more blogs and with guides to lighting design over the summer. These will include bathroom lighting tips, bedroom and garden. If you would like to book an appointment to come and see me please follow this link or call the showroom Monday-Saturday and schedule an appointment 01179425355. I am also writing my book on lighting designs and how to acheive the best results, I am hoping it will be finished later this year.


